
Studio Sound Isolation & Neighbour Impact: Shared Buildings, Structure and Realistic Limits
A practical guide to studio sound isolation, covering neighbour impact, airborne sound, bass transfer, structure-borne vibration, flanking paths, floating construction, shared buildings and realistic expectations for retrofit studio projects.


.avif)
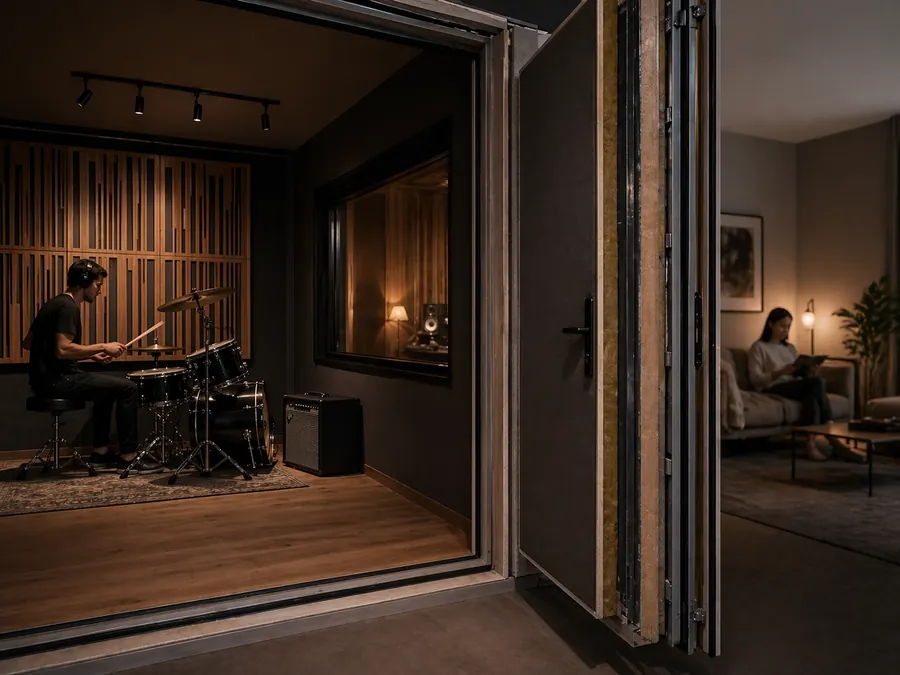
Studio isolation is about protecting both sides of the wall
Studio sound isolation is not only about keeping outside noise out. It is also about controlling the impact of music, monitoring, recording and rehearsal on the people around the studio.
That might include neighbours, family members, other tenants, adjoining rooms, apartments above and below, classrooms, offices, bedrooms, shared corridors or commercial spaces nearby.
A studio can sound good inside and still create problems outside. A room can have impressive acoustic treatment and still leak sound through doors, windows, ceilings, floors, ventilation paths or building structure. This is why studio isolation needs to be understood separately from internal room treatment.
Acoustic treatment improves the sound within the studio. Sound isolation reduces sound transfer between the studio and other spaces. Both can be important, but they are different design problems.
The first question is what kind of sound needs to be isolated
Before designing isolation, the studio use needs to be clear. A vocal booth, podcast room, writing room, mix room, drum room and rehearsal studio all create different sound levels and different isolation challenges.
A quiet voiceover room may mainly need protection from background noise. A control room may need moderate isolation for monitors and late-night work. A vocal recording room may need isolation from traffic, neighbours and internal building noise. A drum room or amplified rehearsal space may need much more serious construction.
The sound source matters. Speech, vocals, drums, guitar cabinets, bass amps, subwoofers, brass, percussion and full-band rehearsal all behave differently. Low-frequency sound and impact are usually harder to control than mid and high-frequency sound.
A useful isolation design starts with the real source level, the surrounding spaces and the acceptable level of impact outside the studio.
Airborne sound is only part of the problem
Airborne sound includes voices, music, monitors, instruments and general sound travelling through air. It can pass through weak walls, doors, windows, ceilings, floors, vents, gaps and penetrations.
Many isolation upgrades focus on airborne sound. This may involve adding mass, sealing gaps, improving doors, using double-stud or isolated wall systems, upgrading glazing, treating ceiling paths or designing isolated room linings.
But airborne isolation is only part of the picture. In studios, especially those involving bass, drums or amplified instruments, structure-borne sound can be just as important.
A room can be well sealed against airborne sound but still transmit vibration through the floor, walls, ceiling or structural frame. This is why studio isolation is often more complex than domestic soundproofing.
Bass transfer is the difficult part
Low-frequency sound is one of the hardest studio isolation problems. Bass from subwoofers, kick drums, bass guitar, electronic music, amplified instruments and cinema-style playback can travel through structure and remain audible at significant distances.
Bass is difficult because it has long wavelengths and is less easily stopped by lightweight construction. It can also excite the building structure, allowing sound to travel through slabs, walls, framing, columns and connected surfaces.
This is why a thin layer of treatment or a standard wall lining does very little for serious bass isolation. Effective low-frequency isolation often requires mass, separation, airtightness, structural decoupling and careful detailing.
If a studio will involve loud bass or drums, the isolation strategy needs to be considered from the beginning. It is rarely a simple add-on.
Structure-borne vibration can travel around the room
Structure-borne sound travels through the building structure rather than only through air. It can be caused by drums, subwoofers, speakers, footfall, mechanical plant, equipment vibration or direct contact between sound sources and building elements.
Once vibration enters the structure, it can travel through floors, walls, ceilings and framing before re-radiating as sound elsewhere. This can make the source difficult to locate. A neighbour may hear bass or impact even when the direct wall between spaces seems substantial.
Isolation design needs to reduce the transfer of vibration into the structure. This may involve resilient mounts, isolated floors, floating construction, decoupled walls, isolated ceilings, equipment isolation and careful junction detailing.
The challenge is that structure-borne sound is often affected by the whole building, not just the studio room.
Flanking paths can limit performance
Flanking paths are indirect sound paths that bypass the main isolation element. They are one of the main reasons studio isolation upgrades underperform.
For example, a wall may be upgraded, but sound may travel through the ceiling cavity, floor slab, façade, ductwork, door frame, service penetrations, structural beams, shared walls or adjoining construction. In shared buildings, these paths can be difficult to see and difficult to fully control.
Flanking does not mean an upgrade is useless. It means the expected result must be realistic. In some cases, the main wall upgrade may provide a noticeable improvement. In others, the flanking path may dominate and limit the value of the work.
A good studio isolation assessment should identify the likely main paths and the weak points that could undermine the design.
Doors are often the weakest part of the studio
Studio doors are critical. A wall may be well built, but if the door is lightweight, poorly sealed or badly framed, the whole isolation strategy can be compromised.
A good studio door strategy may involve a heavy door leaf, high-quality seals, a drop seal, strong frame detailing and careful threshold design. In higher-performance studios, a double-door sound lock may be needed.
The door also has to be practical. It must open and close reliably, allow equipment movement, meet safety requirements and suit the studio workflow.
The most common mistake is treating the door as a normal residential or commercial door. In a studio, the door is part of the acoustic envelope. It needs to be specified and detailed accordingly.
Windows and glazing need careful design
Studio windows can be useful for sightlines, daylight, communication and comfort. But they are also potential weak points.
The performance of a studio window depends on glass thickness, air gap, frame construction, seals, angle, installation and the surrounding wall. A single standard window is unlikely to match a serious isolation wall. A poorly sealed frame can leak sound even if the glass itself is heavy.
Control room to live room glazing, external windows and internal studio windows all need different consideration. Sightlines and communication are important, but the glazing must be designed as part of the isolation system.
If external noise is also a concern, windows may need to protect the studio from traffic, neighbours, weather, plant noise or other outside sources.
Ventilation can compromise isolation
A studio needs ventilation, cooling and comfort. But air paths can become sound paths.
A sealed room with no acoustic ventilation may be unusable. A room with a simple grille or noisy fan may lose isolation or develop a high background noise level. Air conditioning, ducts, vents, transfer paths and plant equipment can all affect both isolation and internal noise.
Good studio ventilation needs quiet air movement and acoustic control. This may involve lined ductwork, attenuated transfer paths, remote fans, low air speeds, suitable grilles, flexible connections and careful plant location.
Ventilation should not be added after the studio shell is complete. It should be part of the acoustic design from the beginning.
Floating construction is useful, but not always simple
Floating floors, isolated walls and resilient ceiling systems can be valuable in studio isolation, especially where impact, bass or structure-borne vibration are concerns. But they are not magic solutions.
A floating floor needs the right mass, resilient layer, perimeter isolation, loading, build-up depth and junction detailing. If it is bridged by fixings, skirtings, pipes, walls or thresholds, performance can be reduced. It may also affect floor height, doors, access, ramps, structure and cost.
Similarly, isolated walls and ceilings need careful detailing. A resilient system can underperform if it is short-circuited, overloaded or interrupted by services.
Floating construction should be used when the isolation requirement justifies it and the building can support it. It needs proper design, not guesswork.
Room-within-room construction has limits
A room-within-room approach can provide strong isolation when designed and built correctly. It usually involves creating an independent internal shell that is structurally separated from the surrounding building as much as practical.
This can be effective, but it comes with trade-offs. It reduces room size and ceiling height. It increases cost and construction complexity. It requires careful ventilation, doors, glazing, services, cable penetrations and structural coordination. It may not be feasible in every apartment, garage, tenancy or home.
A room-within-room system can also fail if it is bridged by structure, services or poor detailing. It is not simply a matter of adding layers.
The decision should be based on the required isolation, the studio use, the building constraints and the budget.
Shared buildings need realistic expectations
Studios in apartments, terraces, commercial tenancies, mixed-use buildings and shared houses need particular care. The building may contain many hidden sound paths. Neighbours may be close. Structural slabs, lightweight partitions, service risers and common areas may all affect performance.
In shared buildings, loud sources such as drums, subwoofers and amplified rehearsal can be very difficult to manage. Even if the studio room is improved internally, bass and vibration may still travel through the structure.
This does not mean studio work is impossible in shared buildings. It means the use needs to be realistic. A podcast room, writing room, production room or nearfield control room may be achievable. A full drum rehearsal room may require a much more substantial build or may not be suitable for the location.
Acoustic advice can help clarify the difference before money is spent.
Neighbour impact should be considered early
Neighbour impact is both an acoustic and practical issue. A studio that creates ongoing disturbance may become difficult to use, even if the room sounds good inside.
Before designing the studio, it is worth identifying sensitive receivers. These might be bedrooms, adjoining apartments, offices, classrooms, shared walls, outdoor areas or rooms above and below. The time of day also matters. A studio used during normal daytime hours may create a different risk from one used late at night.
The isolation target should match the real use and the surrounding context. It is not enough to ask whether the studio is “soundproof.” The better question is: what level of sound reduction is needed for this studio to operate without unreasonable impact?
Background noise matters for recording
Isolation is not only about sound leaving the studio. It is also about sound entering the studio.
Recording rooms, vocal booths, podcast rooms and control rooms may need protection from traffic, neighbours, air conditioning, plumbing, corridors, rain, mechanical plant or other building noise. A room can be isolated enough to avoid disturbing others but still too noisy for recording.
The acceptable background noise level depends on the use. Voiceover, narration, acoustic recording and detailed mixing usually need a quieter environment than casual music production.
If outside noise is part of the problem, the isolation design must work both ways: contain studio sound and protect the studio from intrusion.
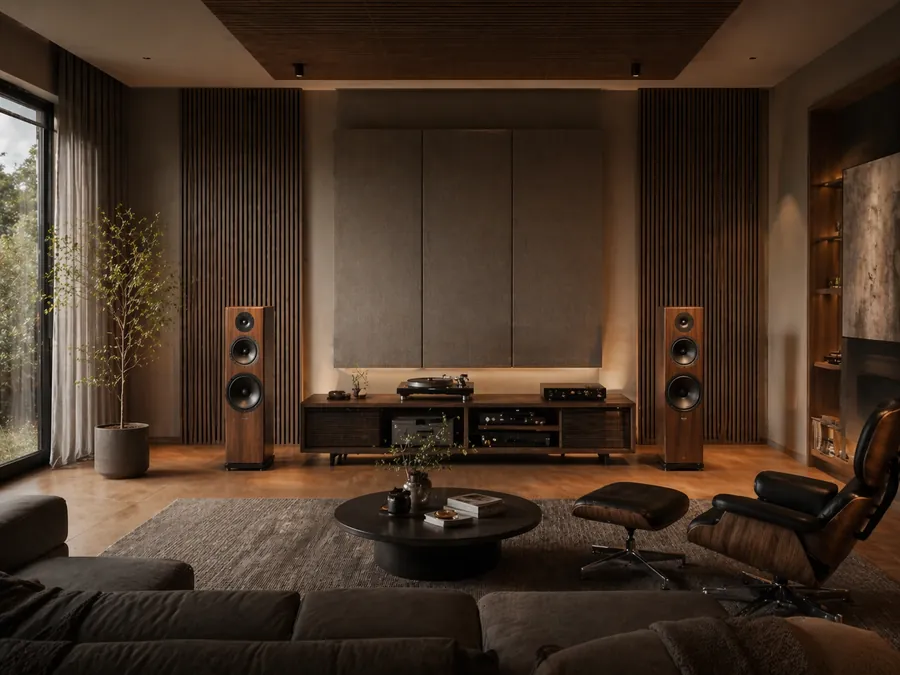
Internal treatment still matters after isolation
A studio shell with good isolation can still sound poor inside if internal acoustics are not addressed. Isolation controls sound transfer. Treatment controls the room sound.
Once the shell is designed, the internal acoustic response still needs attention: bass control, early reflections, reverberation, recording tone, monitoring accuracy, diffusion, absorption and workflow.
It is important not to confuse the shell with the finished studio. A heavy isolated room may still need substantial internal treatment. A well-treated room may still need a better shell if isolation is required.
The best studio projects consider both from the beginning so they do not work against each other.
Isolation upgrades can be staged, but carefully
Some studio projects need to be staged because of budget, access or uncertainty. Staging can work, but it needs to be planned carefully.
The danger is spending money on visible treatment first while ignoring the isolation shell. If the main problem is sound leakage, treatment may not solve it. Conversely, if the main problem is room response, heavy construction may not be the first priority.
A staged approach should identify the most important risk. Is the studio disturbing neighbours? Is external noise ruining recordings? Is the room inaccurate? Is bass uncontrolled? Is the door the weak point? Is ventilation the problem?
Once priorities are clear, the project can be sequenced in a way that avoids rework.
Testing and measurement can help
Studio isolation can benefit from testing, measurement and structured assessment. Depending on the project, this may involve listening tests, site inspection, construction review, noise measurement, isolation testing, or comparison between source and receiver locations.
Measurement can help clarify the scale of a problem, identify likely paths and verify whether an upgrade has improved performance. However, measurements need interpretation. The building context, source type, receiver sensitivity and practical constraints all matter.
For many smaller projects, a practical acoustic consultation may be enough to set direction. For more complex studios, testing and documentation may be valuable before, during and after construction.
Buildability is critical
Studio isolation is highly dependent on build quality. Gaps, rigid connections, service penetrations, poor seals, weak doors, unsealed frames and bridged resilient systems can all reduce performance.
The construction team needs clear details and an understanding of why they matter. A small shortcut can create a major sound leak. A pipe or cable penetration can compromise an otherwise strong wall. A door threshold can undermine the acoustic envelope.
Buildability is not a secondary issue. It is part of the acoustic design. The best isolation strategy is one that can actually be built correctly within the project constraints.
When to get acoustic advice
It is worth getting acoustic advice before building or upgrading a studio where isolation matters. This is especially important if the space will be used for drums, amplified instruments, subwoofers, loud monitoring, late-night sessions, recording, voiceover, podcasting or work in a shared building.
Advice is also useful if complaints have already occurred, if the sound path is unclear, or if the project is about to spend money on doors, walls, ceilings, glazing, floating floors or ventilation.
An on-site acoustic consultation can help identify the likely sound paths, realistic isolation limits and buildable next steps. For more complex projects, technical consulting or reporting may be needed to support design, construction or approval decisions.
Final thought
Studio isolation is not solved by one product, one wall lining or one acoustic panel. It is created by the whole envelope: walls, floors, ceilings, doors, windows, seals, ventilation, structure and workmanship.
The most important step is understanding the real sound path. Airborne sound, bass, impact, vibration and flanking transmission all behave differently. Shared buildings and retrofit projects add further constraints.
The strongest studio isolation design is practical and honest. It identifies what can be improved, what may remain limited and which details matter most. That clarity helps a studio become more usable, more neighbour-aware and more realistic before construction begins.
Frequently Asked Questions
Studio Sound Isolation & Neighbour Impact Advice in Sydney
Specialist acoustic guidance for studio isolation, shared buildings, structure-borne sound and realistic retrofit upgrades.

Studio Sound Isolation & Neighbour Impact Advice in Sydney
Specialist acoustic guidance for studio isolation, shared buildings, structure-borne sound and realistic retrofit upgrades.
Read Nicholas Marriott's bio